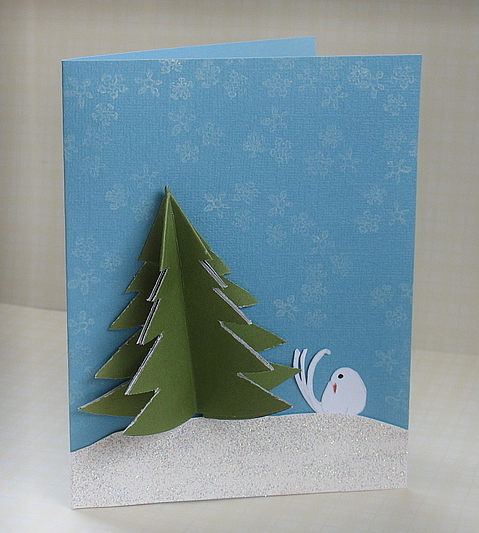
I LOVE origami. And, I love making cards. This easy project is for an origami Christmas card that you can make with the kids.
If you are like me and you need very specific instructions, this tutorial is for you.
You Will Need
For each tree you will need patterned paper cut to the following sizes:
- 3" x 3"
- 2 1/2" x 2 1/2"
- 2" x 2" and
- 1 1/2" x 1 1/2".
Easy Instructions
You will follow the steps below with all 4 pieces of paper.
The first 5 steps are just to make guidelines.
Step 1: fold paper in half.
Step 2: Open.
Step 3: fold diagonally then open.

Step 4: Fold diagonally the other way.
Step 5: Open
Step 6: Fold in half along the step 1 fold.

Here's where it gets a little tricky.
Step 7: Press the right side of the top fold down.

Do the same to the left side.

You have formed a triangle, as seen in number
8.
Step 9: Take the top layer's triangle tip from the bottom right and fold it towards the center and down.
Step 10: Do the same to the right triangle tip.

Now, do the 10 steps with the other 3 squares and stack them, adding a little adhesive to each top triangle tip. You can add a star, trunk, ornaments, a tree skirt, gifts, whatever. Have fun!

Thank you for visiting We Grow By Our Dreams. I have lots more projects and tutorials on my other blog,
The Vintage Sheet Blog.


 I LOVE this
  Here he is again. I colored his belt and headband with my Olive Green Marvy Brush Marker. Cardstock: Die Cuts With a View (card base), Prism (lighter green), Twill ribbon: Ribbon Bowtique, Satin ribbon: from my stash, Inked edges: Tim Holtz Distress Ink-Walnut Stain, Other: faux evergreen twig attached with glue dots.


 Patterned paper and sentiment stickers: DaisyD's, Velvet ribbon: Ribbon Bowtique and red sparkly cardstock.
 I don't know if anyone at the class will like it but I think it's fun. The wrapper is crimped for texture and the sparkly heart was a sticker from Target Dollar Spot. The Stampin Up! Celebrate stamp looks like a signature on artwork to me. I freehand cut out the cupcake and wrapper. Kinda funky. We'll see.


