I had the yummiest soup at a place called Barbacoa in Salt Lake City. Apparently there are several Barbacoas in Utah. Delish. You must go. Anyways, it's one of those places where all the ingredients are lined up and the nice people behind the counter add whatever you want to make whatever you want. The day I went the guy thought it would be funny to ask me everything in Spanish. So, it was also an educational experience.
Anywho, I had a wonderful burrito soup. Since there are no Barbacoas in California (boo hiss!), I decided to make my own and share the recipe with you (hurray!).
Burrito Soup
You'll need:

1 Quart of vegetable broth
1 Can of white hominy (it's a corn product)

Bell peppers and onion (I used 1 green, 1/2 red, 1/2 yellow and 1/4 onion)

2 cans of beans, rinsed and drained (Barbacoa lets you choose between black or pinto)

Sour cream, 1 cup shredded cheese and 4 corn tortillas (or use tortilla chips, crushed)

2 cups Cooked rice (I use brown but it's a free country, use white if that's what you're into.)
Let's do it!
First, heat up the broth and hominy in a 2 quart pot. Set aside.

Slice the peppers and onions, fajita style.

Saute in olive oil until the onions are golden brown. Place mixture in serving bowl.

Slice tortillas into 1 inch squares (nevermind this if you are using chips.)

Fry in a pan with some canola oil until crisp.

Drain on paper towels and sprinkle with salt.
Everyone gets to serve themselves for this one.
Here's the order:
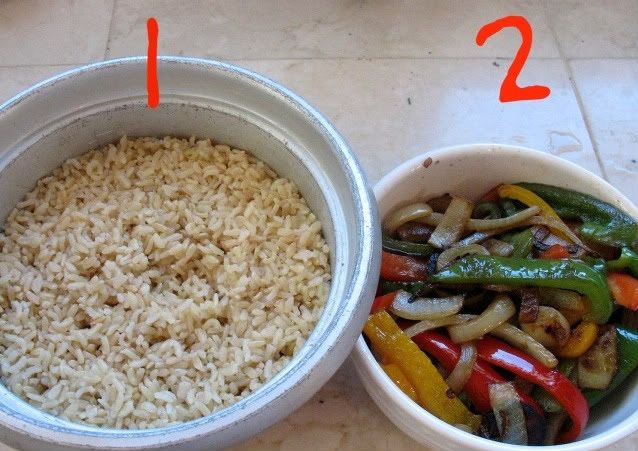
1. Rice
2. Peppers and onions

3. Beans
(at Barbacoa you also have the choice of shredded chicken, beef, or pork at this point. Hello leftovers!)
4. Broth (don't forget to scoop the hominy from the bottom.)

Finish it off with:
5. Cheese
6. Chips
7. Sour cream
How did I do?

or