Food                      Fabric                    Paper                    Holidays                    Decorating                   Giving                     
Showing posts with label festive. Show all posts

Sunday, February 7, 2010

Super Bowl Spread

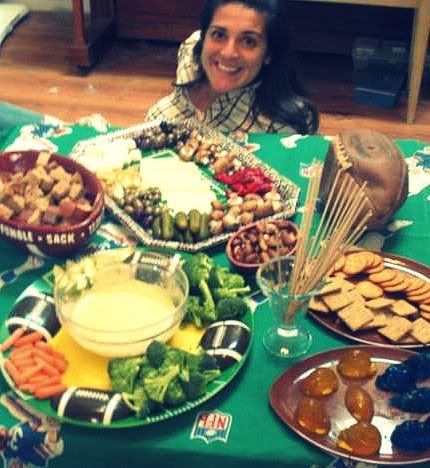
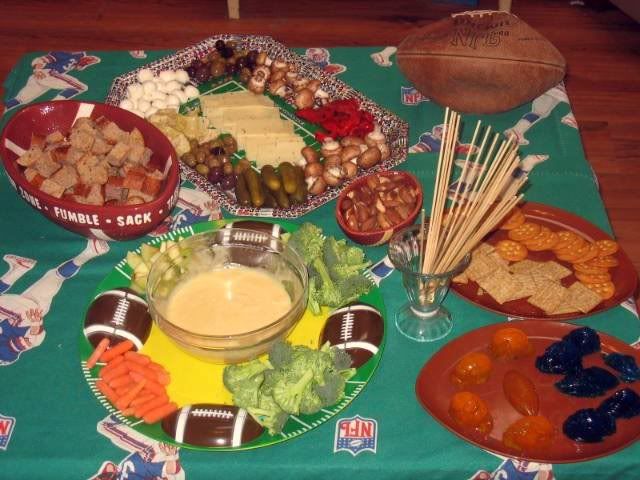
Super Bowl Sunday is a holiday at the Grow home. I collect foot-ball themed treasures all year long at garage sales and thrift stores. This year I was thrilled to find the NFL tablecloth and the little football bowl with a football spreader.
This year's menu:
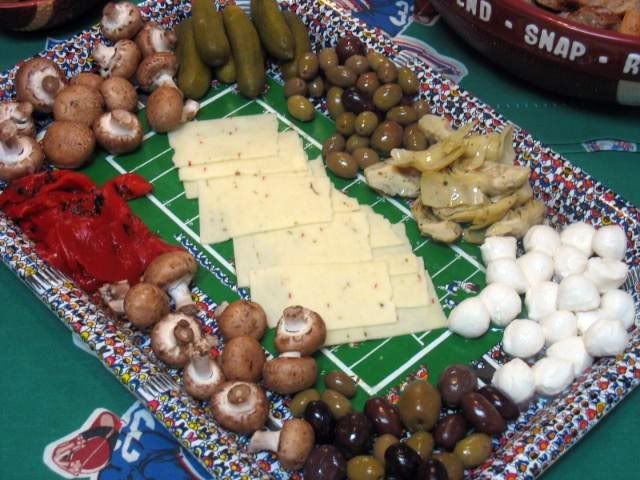
Antipasti platter including olives, peppers, mushrooms, artichoke hearts, mozzarella balls, kosher pickles and spicy jack cheese

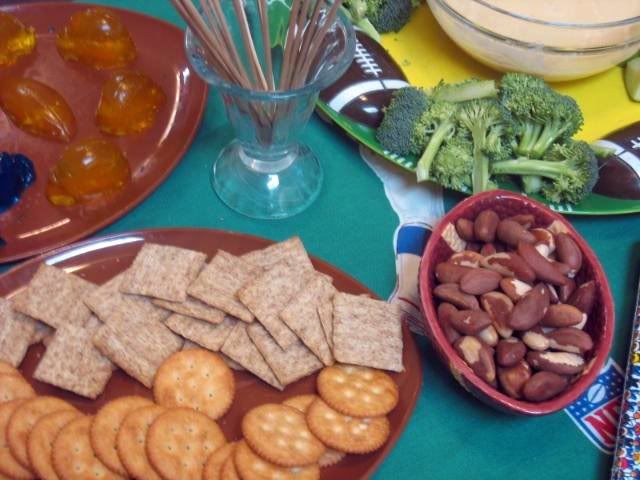
Crackers and Brazil nuts (don't they look a little like footballs?)
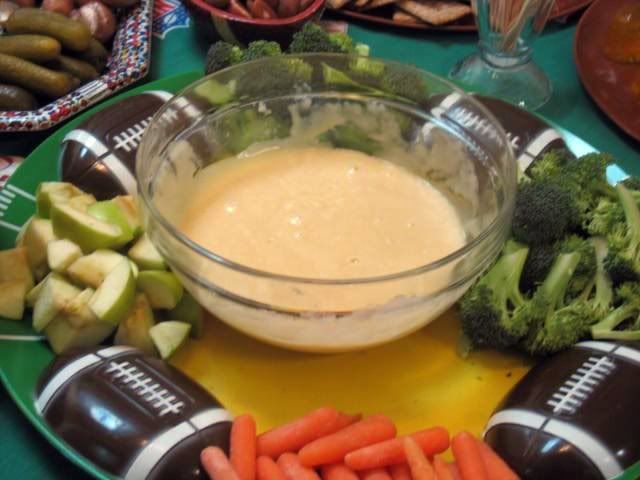
Cheese fondue with green apples, broccoli, carrots, and Panera bread cubes
For dessert: Jell-O jigglers in Saints gold (sf lemon) and Colts blue (raspberry)
Not pictured: Turkey Sausage Chili and Vegetarian Chilli
Thanks for stopping by my blog. I hope your team wins. Please say, "hi" if you have the time. :)

Wednesday, January 20, 2010

Heart Table Runner

I whipped up this table runner to coordinate with the Valentine's Day pennant I made last year. Since I set the goal to create more tutorials this year, I've included pictures and directions.

Heart Table Runner
You'll need:
Heart Pattern (see below)
White felt (sold by the yard)
Red and white fabrics (probably a yard total)
Buttons and ribbon
Sewing Machine
Needle and Thread
Pinking Shears and rotary cutter

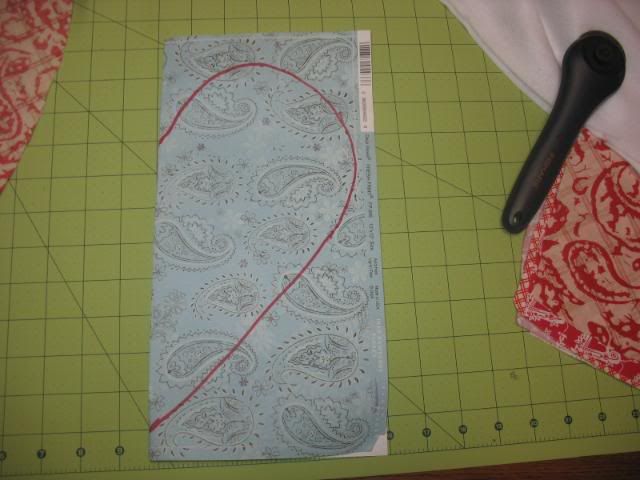
First, make your heart pattern. Fold a piece of 12 x 12 scrapbooking paper in half and draw this:
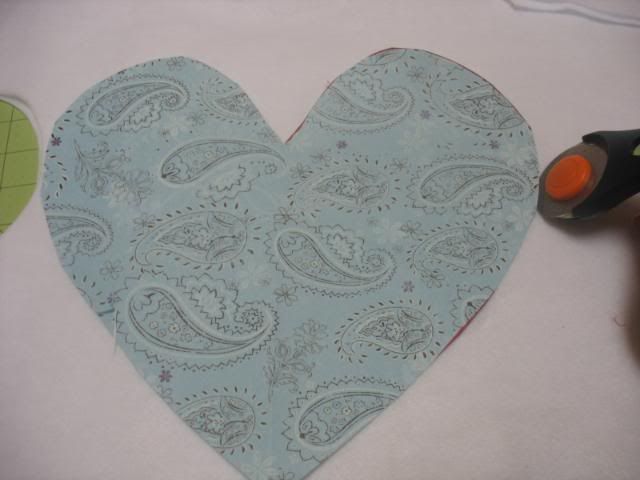
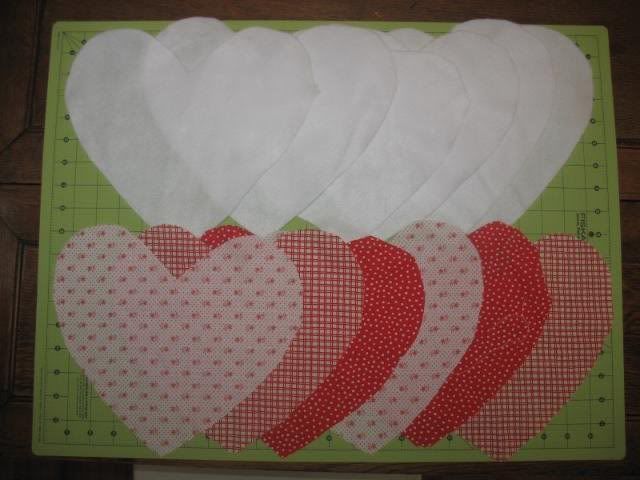
Unfold and cut it out along line. Lay pattern on top of two layers of white felt and cut out using scissors or rotary cutter. Repeat until you have 6 white hearts cut out. Now, cut out your red and white fabric hearts.
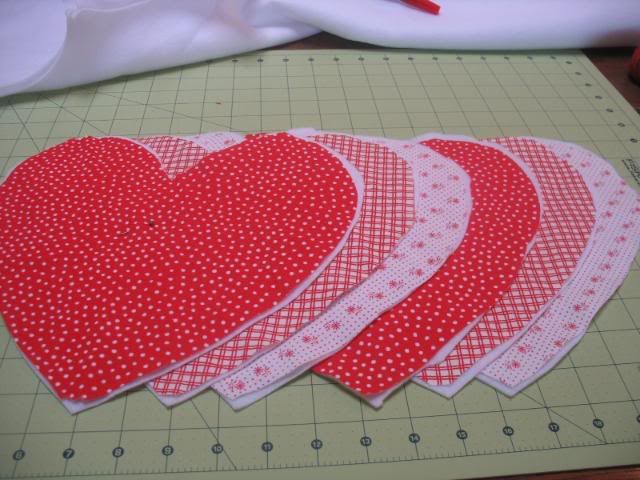
See, you have 6 white hearts and 6 red/white hearts. Now, place a red/white heart on top of a white heart and pin with the right side facing up. I only do one pin in the middle but you can do a few if that makes you feel more comfortable.
 
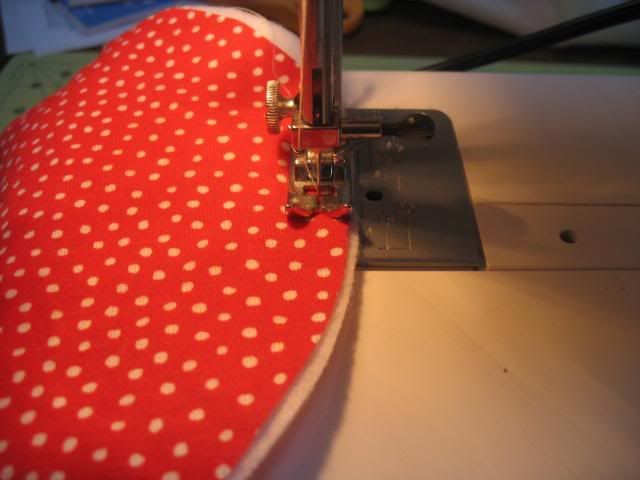
Don't stress if the sides don't perfectly match. We'll take care of that later. It's time for some sewing. You can see how the felt is totally wider than my red fabric. So, I'm using my top piece as my guide.
 
 Sew all the way around the heart. I use about a 3/8 inch. Don't go smaller but you can go a little wider. Do this for all 6 of your hearts.
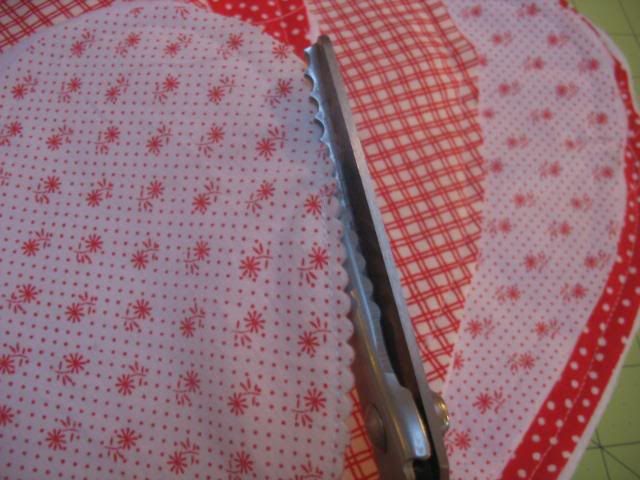
Using your pinking sheers, cut all the way around the outside of your heart. The width from the stitching doesn't matter as long as you don't cut your stitches. Now, let's attach our hearts.
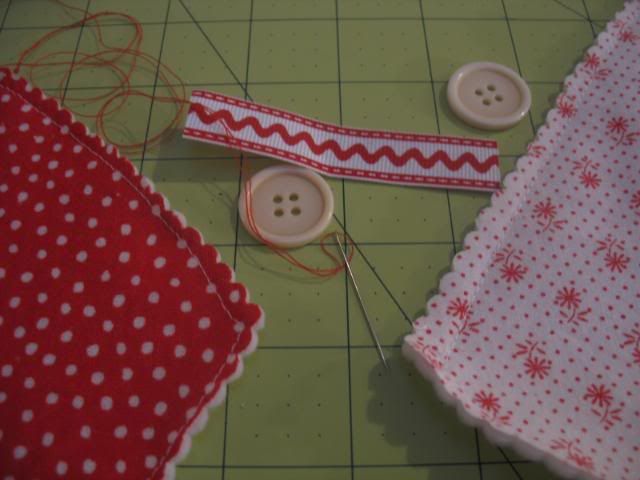
 Using a needle and thread (I used red thread) you are going to connect the hearts with a ribbon on the back and buttons on the front. You'll do this pointy ends (of the heart) together and then rounded ends together.
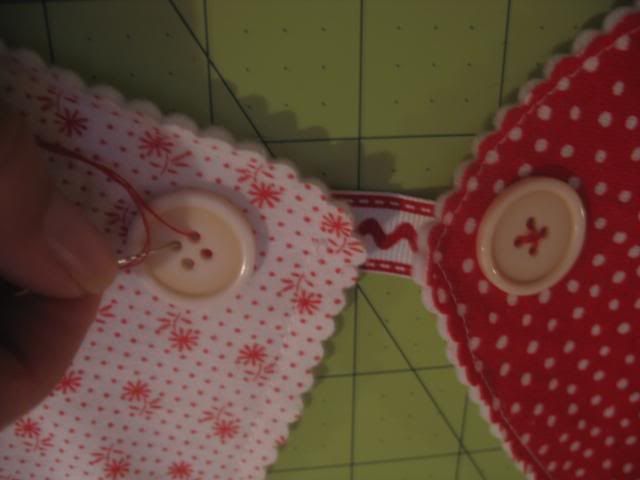
 I used 3 inch long strips of 1/2 inch ribbon but you can use wider or more narrow ribbon if you like, depending on the size of your buttons. This is a picture of the back.
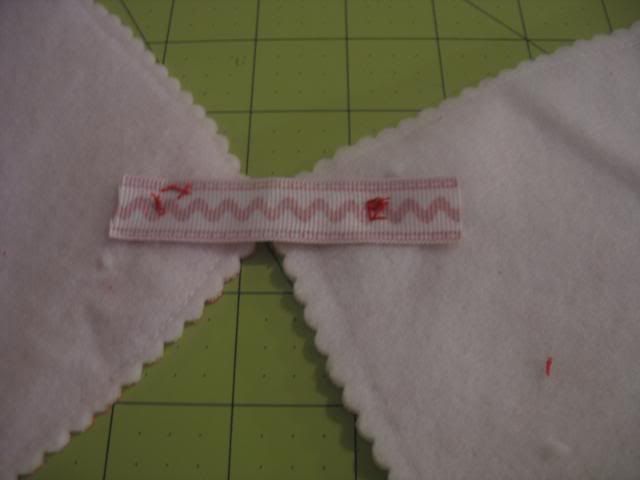
This is how the rounded edges are attached.
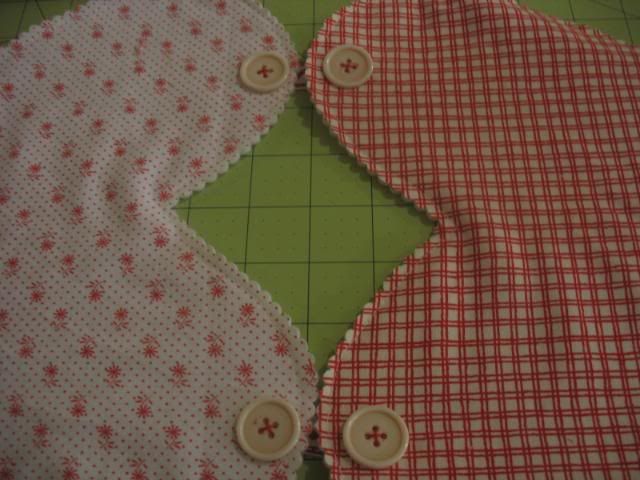
Attach all the hearts and you are done. You can make it longer or shorter. Just remember to do an even number of hearts.
Enjoy! Thanks for visiting my blog today. Thank you Tip Junkie for featuring me. And, welcome Craft Critique Valentine's Day Carnival visitors. Please leave me a comment and say, "hi." You may also enjoy my new pink candy tutorial.

Saturday, January 2, 2010

Party Hat Banner

nI made a banner for New Years so my kitchen window wouldn't be naked until Valentine's Day. I was going for the look of party hats. I might add a pom pom on the tops so they look less like Christmas trees.
This one took a little longer than my usual triangle banners. In order to finish my edge, I used ric rack, ribbon and pom pom fringe. Which, I think, added more to the party hat look.I used a bunch of fabric that I had leftover from other projects around the house. Thank you for stopping by my blog. I'm hoping to have lots more fun stuff to share with you this year.

Tuesday, December 1, 2009

Countdown to Christmas

I love the Christmas season. Every year our family celebrates the upcoming Christmas holiday with advent calendars. We have several. I'd love to share them with you along with some other ways that you can count down the days to Christmas.

For those of you who do not know, I'll define advent. Advent (from the Latin word adventus, meaning "coming") celebrates the days leading up to the celebration of the birth of Jesus Christ. The calendar counts backwards (usually from 24 to 1) or, it fills in the 25 days of December until Christmas.

I made this first calendar for myself with a black cookie sheet, ribbons, scrapbook paper and lots of fun things from my craft box. The calendar starts off with a blank grid and then I put one of the magnetic numbers on every day.
The next calendar is my niece's. It is made of felt, buttons and glitter. Every day she takes a little roll of paper from a heart. She is given instructions for that day. Today she needs to do something special for someone. This next one is really fun. I was in an advent calendar swap. Each of us made 2 numbers and we swapped them. I made the cookie sheet background very similar to the first calendar. Next up is my mother's calendar. It has 24 little windows. In every window there is a magnetic character from the Christmas story and a piece of chocolate. It is fun to watch the scene be built throughout the month. Lastly, we have a fun "24 Chocolate Days 'til Christmas calendar that was given to my niece this year.

There are lots of other ways to countdown to Christmas. Here are a few I found on the internet:

How do you celebrate the days leading up to Christmas. Do you have a calendar or do you do special activities? I'd love to know (and see pictures.) Thank you again for allowing me to share my ideas with you.

Thursday, November 26, 2009

Happy Thanksgiving


It's time for another open house. Please enjoy these images from my home. Let's start with the front door. My sister painted our Grow pumpkin. Once you come inside you are greeted by Paris. I don't think he likes his pumpkin costume.


Let's go in the kitchen. This is the shelf above the sink. The turkey in the middle was created by my niece when she was in kindergarten. It's part of a series.


Then, above the front window hangs the banner I sewed this year along with a welcome sign painted by my sister.


All of the glass cupboards have pumpkin ephemera inside.


Let's go in the dining room. We have china we only use for Thanksgiving. The wheat plates were from my mum's mum. Later, we'll put the Thanksgiving serving pieces out. They are from my Dad's mum.


I am really excited about my new project this year. It's a "stuffed" turkey. I saw it on the V and Co blog and I knew I had to make it.


I made little pumpkin place cards for everyone with a gingerbread cookie mix and melted orange chocolates.


This is a funny pillow that sits on our living room chair.

.

Here's the top of the piano. My niece worked her magic there.


That concludes our Thanksgiving open house. I hope that you have a wonderful Thanksgiving. I'm grateful for you.

Monday, September 28, 2009

Under the Sea Party

We do parties pretty big at the Grow house. This last week was my niece's 8th birthday. Most of the stuff we did ourselves but the cake was from Baskin Robbins. We added the sea life candles from Oriental Trading. Let's hit the food table first.No Grow party is complete without Krispie Pops. This year I did an aquarium and clownfish. I made a chex mix with goldfish and oyster crackers.
Fruit plate with cute fish toothpicks.My sister saw these clam cookies somewhere and recreated them. The pearls/eyes are yogurt raisins.Silly games are always part of our festivities. My sister painted a dog cone to look like a shark. The game is called "feeding frenzy. The kids have to throw shark bait at the shark. One party goer loved the shark cone so much that she ate her cake with it on. We also had an obstacle course that was completed wearing goggles and flippers. The kids collected "pearls" in their bucket along the course.In a kiddie pool, the kids did a dolphin ring toss and a fishing game. . Now, some decor pics. Here are 3 partygoers on a beach towel in front of the kiddie pool and very large banner that my sister made using poster paper and fish cut outs. My niece pulled out all of her ocean books and stuffies to decorate my piano.
The patio was decorated like an aquarium with hanging fish, balloons and metallic streamers.

Lastly, this is the front of the invitation. My sister designs and makes them herself every year. Not pictured: the dolphin pinata, goodie bags and my niece in her mermaid costume. Also, the swedish fish and gummie sharks were gone before I could take a picture of them.

LinkWithin

Related Posts with Thumbnails