Food                      Fabric                    Paper                    Holidays                    Decorating                   Giving                     

Tuesday, November 27, 2007

3d Christmas Tree with Tutorial

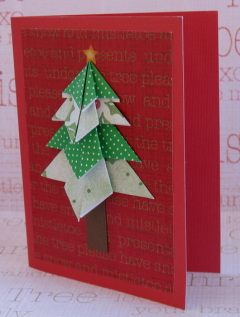
IThis is a super fun 3d tree. This is an origami Christmas card that would be a fun project for kids to make. I got the idea from an old issue of Pack-O-Fun Magazine.


To make the tree, you will need:


  • 1 piece of 6" patterned paper. 

Instructions:

Step 1: Cut out a 6 inch circle of patterned paper.
Step 2: Fold the circle in half and then in half again.
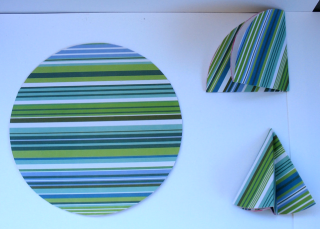


Step 3: Fold the quarter circle into thirds, radiating from the point.
Step 4: Open up paper so it is a half circle again. Now, fan-fold along previously folded lines.
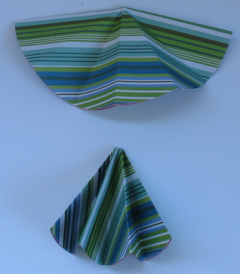


Step 5: The top picture shows the fold that you do NOT cut on. Flip it upside down. You want the 2 folds and 2 ends side. Using sharp scissors, cut 3 v's like the bottom picture.
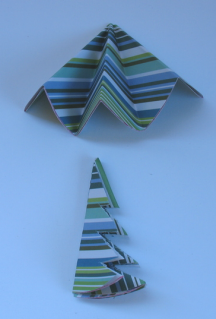
 

Step 6: Here's a picture of the back. Place some adhesive in the folds.
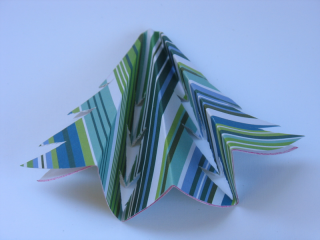


Step 7: Flip your tree over and adhere it to card front.


Optional idea: Make 2 trees and adhere together. Thread string through the top and use as an ornament or on top of a gift.

Thank you for visiting We Grow By Our Dreams today. I have lots more projects and tutorials on this and on my other blog, The Vintage Sheet Blog. 


Monday, November 26, 2007

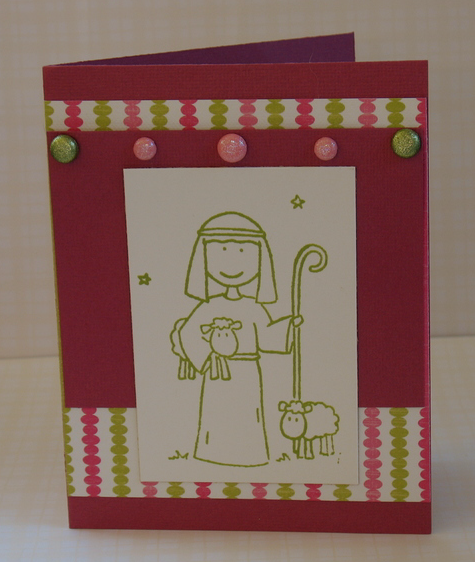
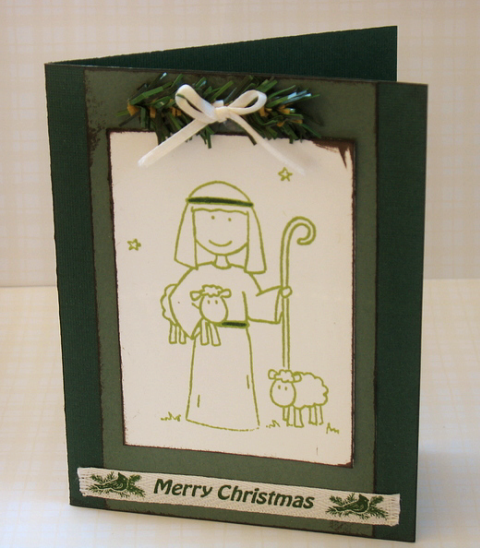
Same Stamp. Same Ink. Two Looks.

Pink and Green Shepherd

I LOVE this Elzybells Art Stamps Shepherd.  This is the one I ordered from the UK site. Cardstock: Bazzill Basics, Patterned Paper: K & Company, Ink: TAC-Native Land, Sparkly brads: Making Memories.

Green Shepherd

  Here he is again. I colored his belt and headband with my Olive Green Marvy Brush Marker. Cardstock: Die Cuts With a View (card base), Prism (lighter green), Twill ribbon: Ribbon Bowtique, Satin ribbon: from my stash, Inked edges: Tim Holtz Distress Ink-Walnut Stain, Other: faux evergreen twig attached with glue dots.

Tomorrow I'll have a 3d Christmas tree card with a tutorial. It's even easier than the origami tree. :)

Friday, November 23, 2007

Elzybells Red and White Christmas Hello


When I saw Marie Kirkwood's ribbon tree on the Stamp Shack, I knew I would have to give it a try. Heaven knows I have ribbon scraps. I put a sparkly heart at the top of the tree from the Target dollar spot. The image and sentiment are Elzybells. The skater girl was an image RAK from my Shack friend, Sherri. The "hello" was a suprise from Elizabeth (Elzybell) in my package from the UK site. I am super happy with my order. I'll post a card with my amazingly adorable shepherd stamp very soon.

Saturday, November 17, 2007

Quick, Inexpensive Christmas Card and Invitation Idea

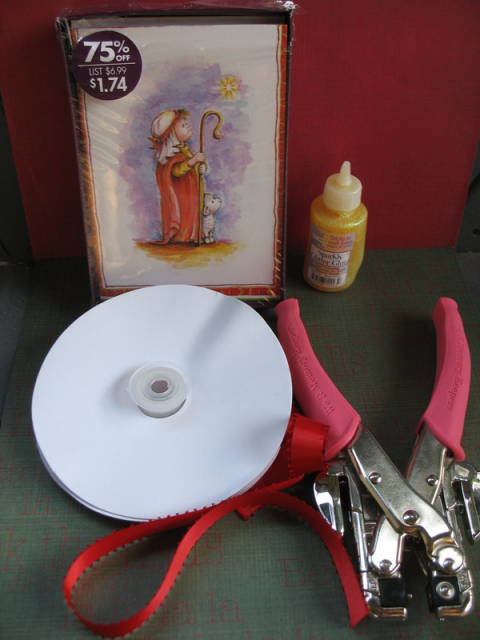
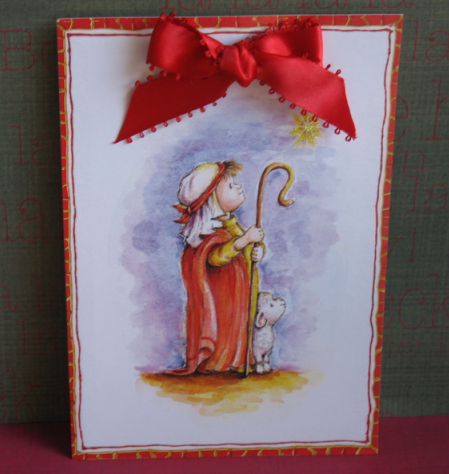
Here's a way to easily transform cheap store-bought Christmas cards into pretty Christmas cards or invitations.

Easy Christmas Cards

You'll need: A box of plain, store-bought Christmas cards (I paid $1.74 for 18 cards), Glittery glue, ribbon and a Cropadile.

Step 1: Open up all the cards and stack them face up.

Step 2: Punch two holes on the top of each card.

Step 3: Apply Glittery Glue to the item you want to highlight (I did the star).

Step 4: Cut ribbons to desired length, thread through holes and tie bow.

Invitations

To make an elegant and easy invitation, follow steps above except after step 1, cut the back flap off the cards (so it's like a postcard). And, after step 2, measure your card. Using your word processor program design text for back of card. Print. Then, continue with steps 3 and 4. I made 150 of these babies for our church Christmas party. They were a lot easier than the 2 layer invites with a punched border that I made last year.

Wednesday, November 14, 2007

Origami Christmas Tree Tutorial

I LOVE origami. And, I love making cards. This easy project is for an origami Christmas card that you can make with the kids.


If you are like me and you need very specific instructions, this tutorial is for you.
You Will Need
For each tree you will need patterned paper cut to the following sizes:

  • 3" x 3"
  • 2 1/2" x 2 1/2"
  • 2" x 2" and 
  • 1 1/2" x 1 1/2". 

Easy Instructions
You will follow the steps below with all 4 pieces of paper.
The first 5 steps are just to make guidelines.

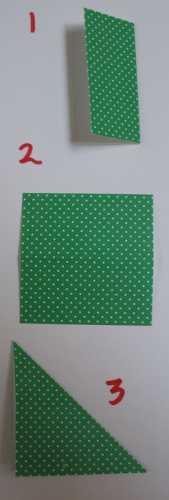
Step 1: fold paper in half.
Step 2: Open.
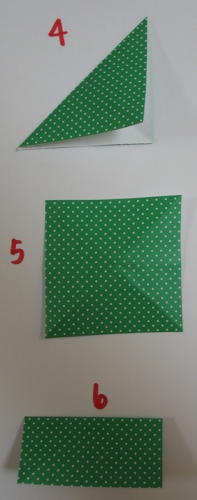
Step 3: fold diagonally then open.


Step 4: Fold diagonally the other way. Step 5: Open Step 6: Fold in half along the step 1 fold.


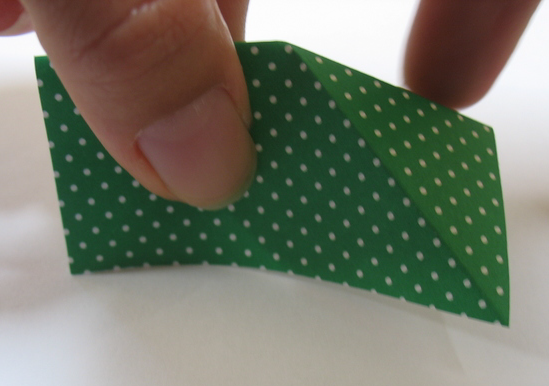
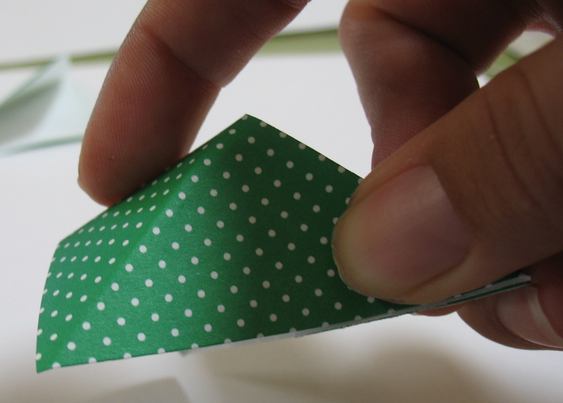
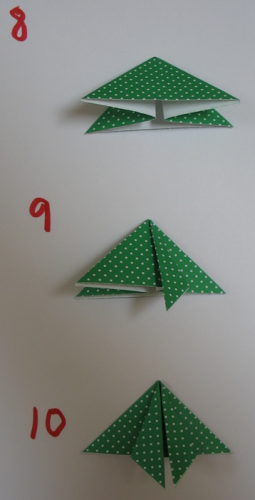
Here's where it gets a little tricky. Step 7: Press the right side of the top fold down.


Do the same to the left side.


You have formed a triangle, as seen in number 8.
Step 9: Take the top layer's triangle tip from the bottom right and fold it towards the center and down.
Step 10: Do the same to the right triangle tip.


Now, do the 10 steps with the other 3 squares and stack them, adding a little adhesive to each top triangle tip. You can add a star, trunk, ornaments, a tree skirt, gifts, whatever. Have fun!


Thank you for visiting We Grow By Our Dreams. I have lots more projects and tutorials on my other blog, The Vintage Sheet Blog. 


Tuesday, November 13, 2007

3 More Cards

These are three more samples for the easy card class I'm teaching tonight. Enjoy!

Vintage Christmas Card

Patterned paper and sentiment stickers: DaisyD's, Velvet ribbon: Ribbon Bowtique and red sparkly cardstock.
Origami Christmas Tree Card

I saw several versions of this card on Splitcoast Stampers and several had instructions but written instructions totally go over my head so I'll post a tutorial with pictures this week. I used a bunch of papers that have been in my stash for a while including Provo Craft and Making Memories. The star on top is a Creative Memories sticker.

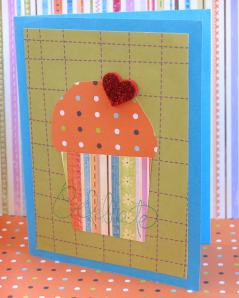
Fun Cut Out Cupcake Card

I don't know if anyone at the class will like it but I think it's fun. The wrapper is crimped for texture and the sparkly heart was a sticker from Target Dollar Spot. The Stampin Up! Celebrate stamp looks like a signature on artwork to me. I freehand cut out the cupcake and wrapper. Kinda funky. We'll see.

LinkWithin

Related Posts with Thumbnails